Tutorial
The following tutorial lays out a basic initial path to start using the Developer Hub. Alternate paths are omitted to simplify familiarization with the environment.

TL;DR
Below is the live example of what will be achieved by the end of this tutorial and the source code.
Let's start coding
Create new module
To start we are going to use React as technology and create the project with the tool Create React App (opens in a new tab) using a basic template adapted to the Developer Hub: @everymundo/registry-module (opens in a new tab).
Run the following command to build the project: (hello-react will be used as the project name and folder)
npx create-react-app hello-react --template=@everymundo/registry-moduleNote: This started template also has Craco and Storybook configured.
Project structure
When the project hello-react has been generated you'll see the following folders and files:
- index.html
- robots.txt
- setup.json
- index.js
- package.json
- ...
Three files have been highlighted because they are closely associated in the integration with the Registry Ecosystem:
public/setup.jsonpackage.jsonsrc/index.js
Setup.json file
The Setup.json is the module contract. This file defines the needs of the module and its behavior with respect to the Developer Hub.
In this tutorial the module will define some configuration in the setup.json:
- A dynamic settings
titleof type string. - A label has been used with the key
example-label-key. - Also it is specified that the module will consumed dynamic styles tokens from EDS Design System.
{
  "metaData": {},
  "context": {},

  "settings": {
    "schema": {
      "properties": {
        "title": {
          "title": "Title",
          "description": "Description, lorem ipsum lorem ..",
          "help": "Hint: Text next to a field to guide the end user filling it",
          "placeholder": "Placeholder ..",
          "type": "string",
          "default": "Hello React"
        }
      }
    }
  },

  "styles": {
    "service": "codeless",
    "options": {
      "type": "eds",
      "format": "json"
    }
  },

  "i18n": {
    "labels": {
      "example-label-key": "Primary color"
    }
  },

  "tokens": {},
  "services": {}
}Note: When you build the project, you must make sure that this setup.json file goes to the root of the generated folder.
Package.json (with @everymundo/registry-script)
It is important that you include @everymundo/registry-script library as a dependency. Registry Script is the library that allows communication with the Developer Hub.
{
  "name": "hello-react",
  "version": "1.0.0",
  "private": true,
  "dependencies": {
    "@everymundo/registry-script": "latest",
    "react": "^18.2.0",
    "react-dom": "^18.2.0",
    "react-scripts": "5.0.1"
  },
  "scripts": {
    "start": "craco start",
    "build": "craco build",
    "test": "craco test",
    "eject": "react-scripts eject",
    "storybook": "start-storybook -p 6006 -s public",
    "build-storybook": "build-storybook -s public"
  },
  "eslintConfig": { ... },
  "browserslist": { ... },
  "homepage": ".",
  "devDependencies": { ... }
}
Registry Script in index.js
Lorem ipsum dolor sit amet, consectetur adipiscing elit. Nunc lacinia, turpis eu sodales efficitur, justo nibh molestie orci, id malesuada odio velit eu lacus.
import { isReady } from "@everymundo/registry-script";

import React from "react";
import ReactDOM from "react-dom";

import App from "./components/App";

isReady().then(async (payload) => {
  ReactDOM.render(<App payload={payload} />, document.getElementById("root"));
});
Develop your module
Super, the new module has been created in the hello-react/ folder. Access that folder and start the development server.
cd hello-react
npm start
At this point you can familiarize yourself with the code and add the functionality you need. Here are some suggestions.
Enrich setup.json using Registry Editor
Lorem ipsum dolor sit amet, consectetur adipiscing elit. Nunc lacinia, turpis eu sodales efficitur, justo nibh molestie orci, id malesuada odio velit eu lacus.
Develop and test with Registry Playground
Lorem ipsum dolor sit amet, consectetur adipiscing elit. Nunc lacinia, turpis eu sodales efficitur, justo nibh molestie orci, id malesuada odio velit eu lacus.
Note: that in order to view the project you must open it using the Registry Playground: https://everymundo.github.io/developer-hub/playground/?url=http://localhost:3000/ (opens in a new tab)
Deploy module
Once the module is ready, it is time to deploy it. For this we will use the Registry CLI
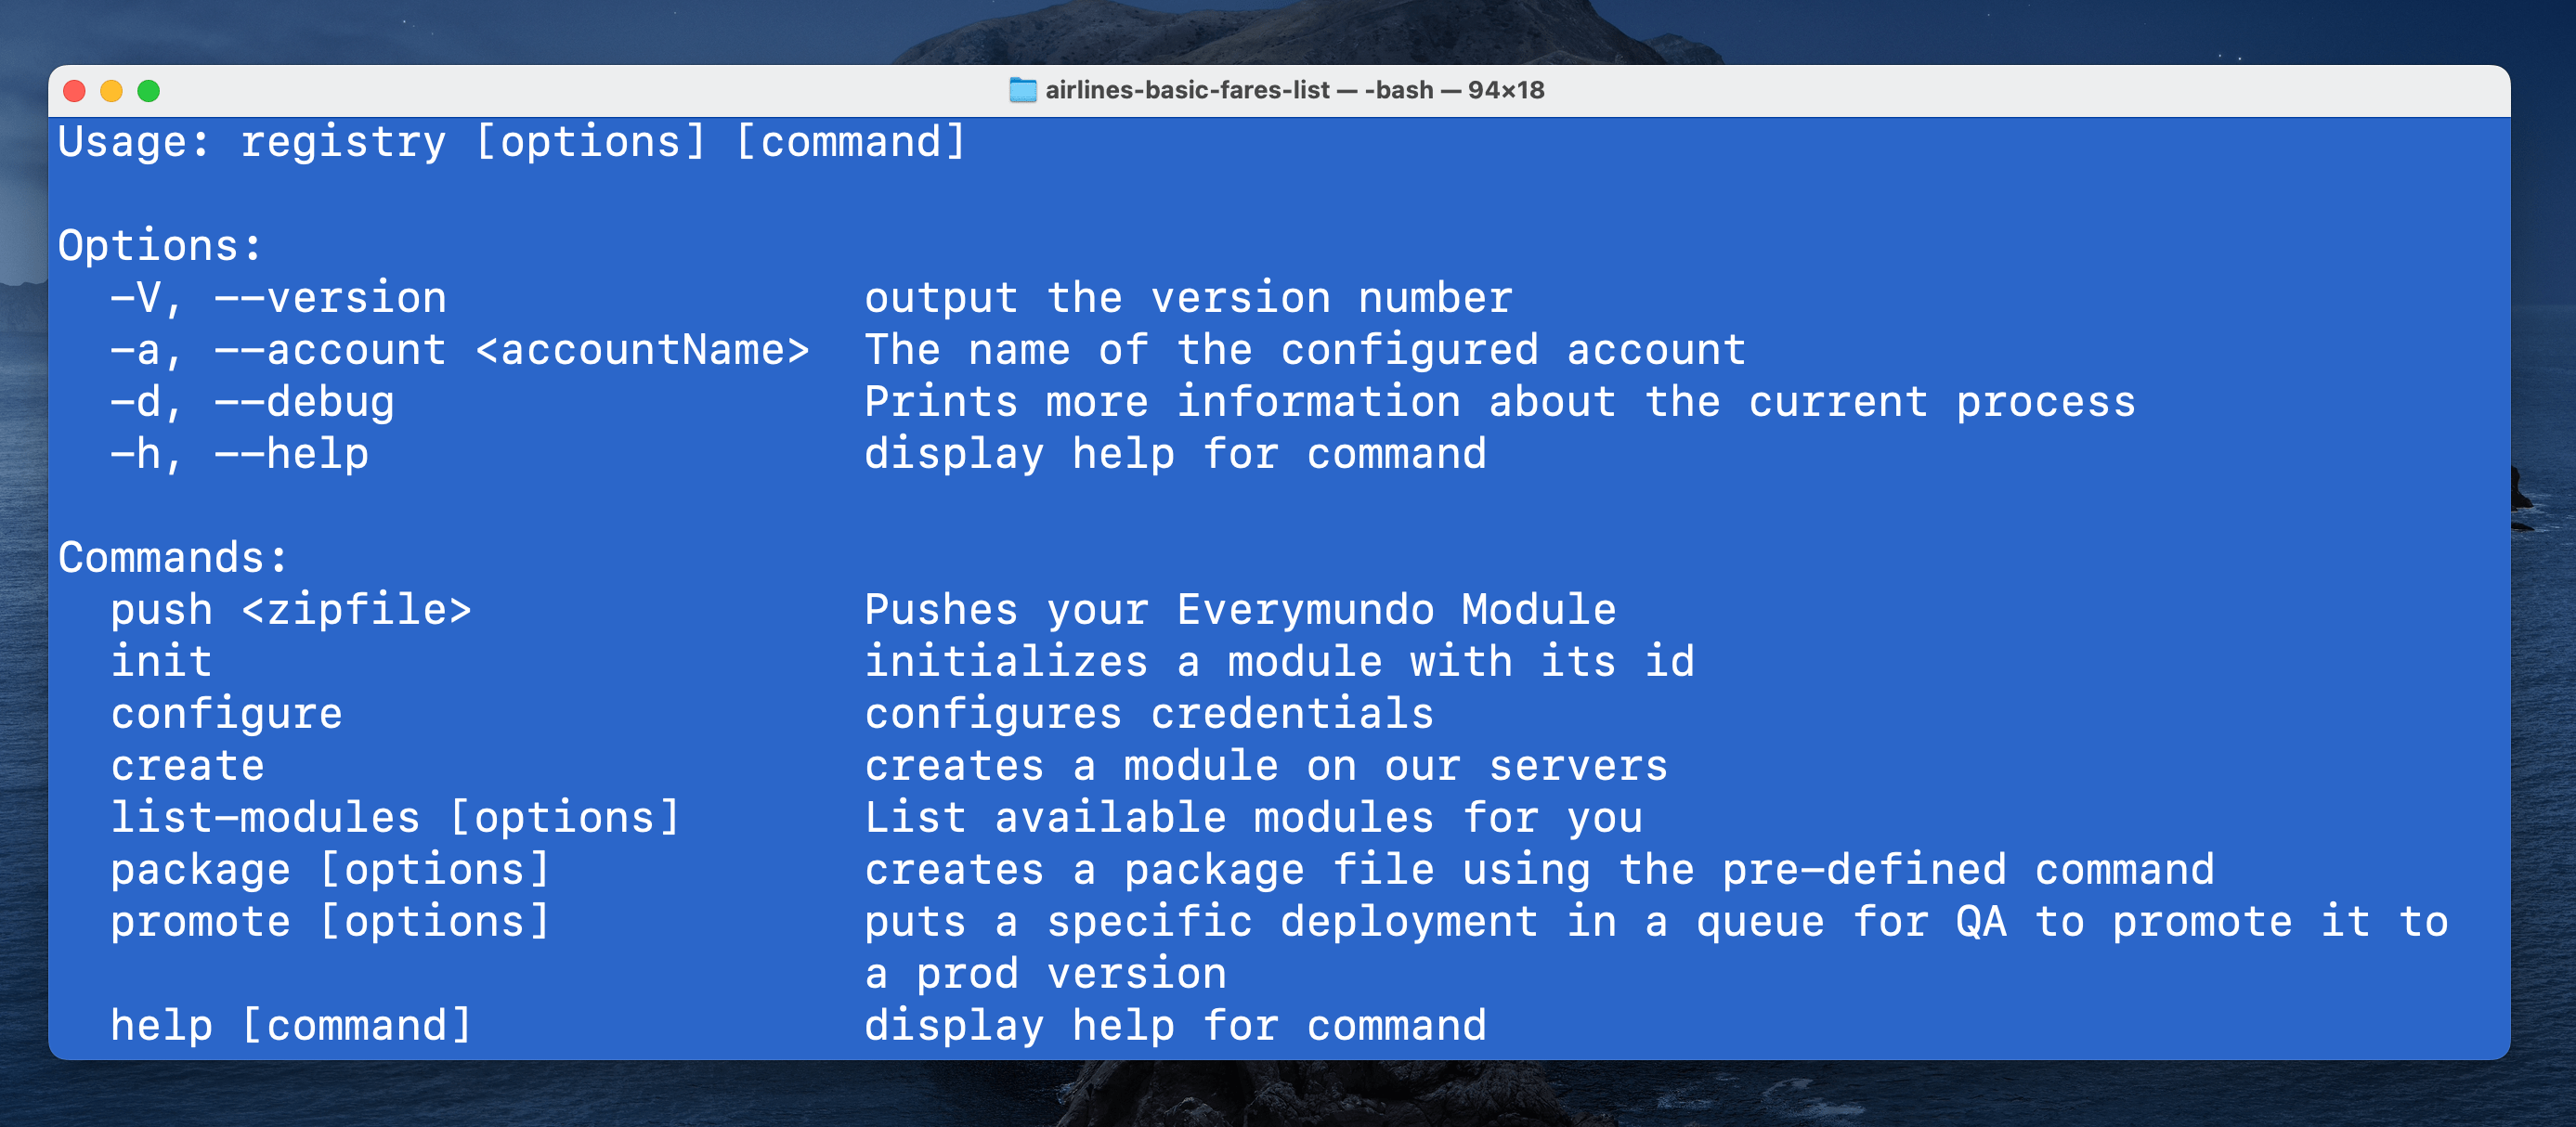
Install Registry CLI
The following command installs the Registry CLI globally:
npm i -g @everymundo/em-registry-cliSet your Credentials
Then, let's authenticate to the Ecosystem. You must enter the credentials provided, if you do not yet have them, request them before.
registry configure

? What's the accountId [] ABCD
? "What's the userId [] user1"
? "What's the userId [] user1"
Define a new module
This step is to associate your local module with a new module registered in the ** Developer Hub**. To run the following command you must be inside the project folder (in this hello-react tutorial).
registry create

? Module name <Some name>
? What companies are you building this module for? *
? What's the build directory? build
? What's the pre package command? npm run build
You will notice that if everything happens correctly an em-module.json file will be created
Push the module
Once your module has been registered you can deploy the code.
registry package --build --pushThis step will build the module and upload it to the servers. A preview URL of the module is returned, you can view it using the Registry Playground. You will be able to do as many pushes as you need, and you will always get a different preview URL.